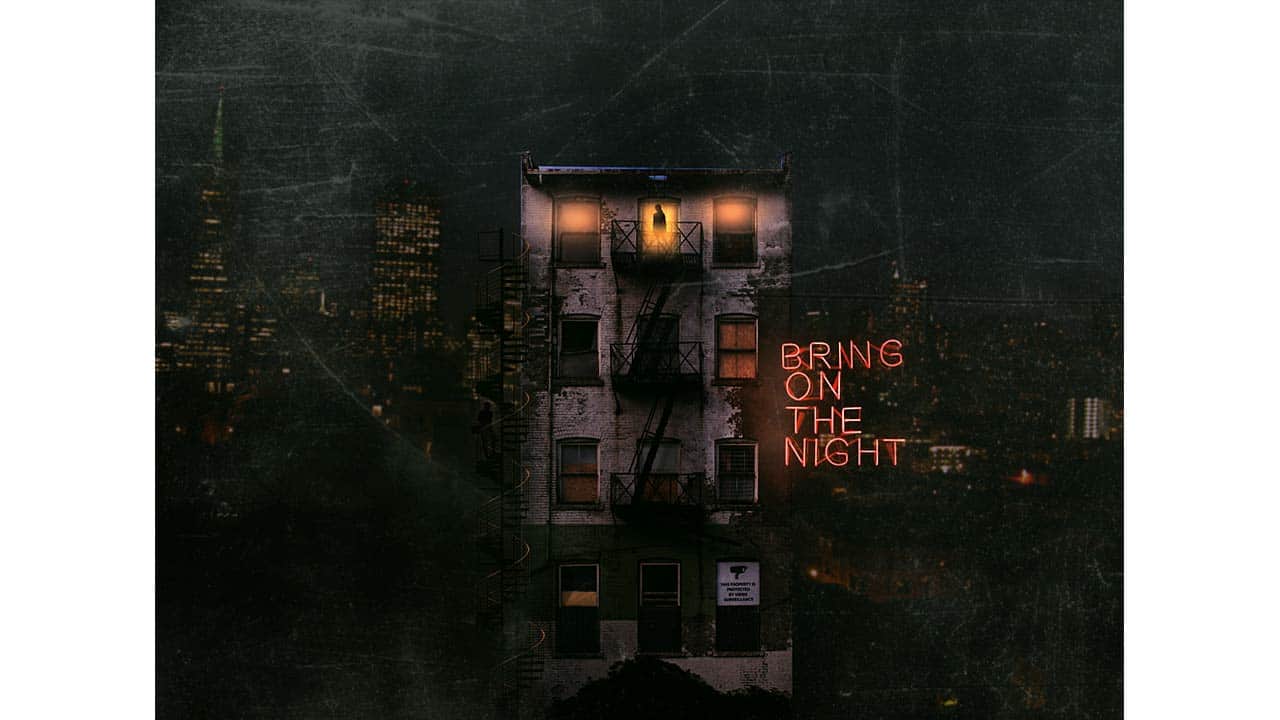
Wiztoonz Academy of Media & Design’s Film making and Photography Head, Mahesh Ravi shares his workflow for creating the conceptual image, Bring on the Night using Adobe Photoshop.
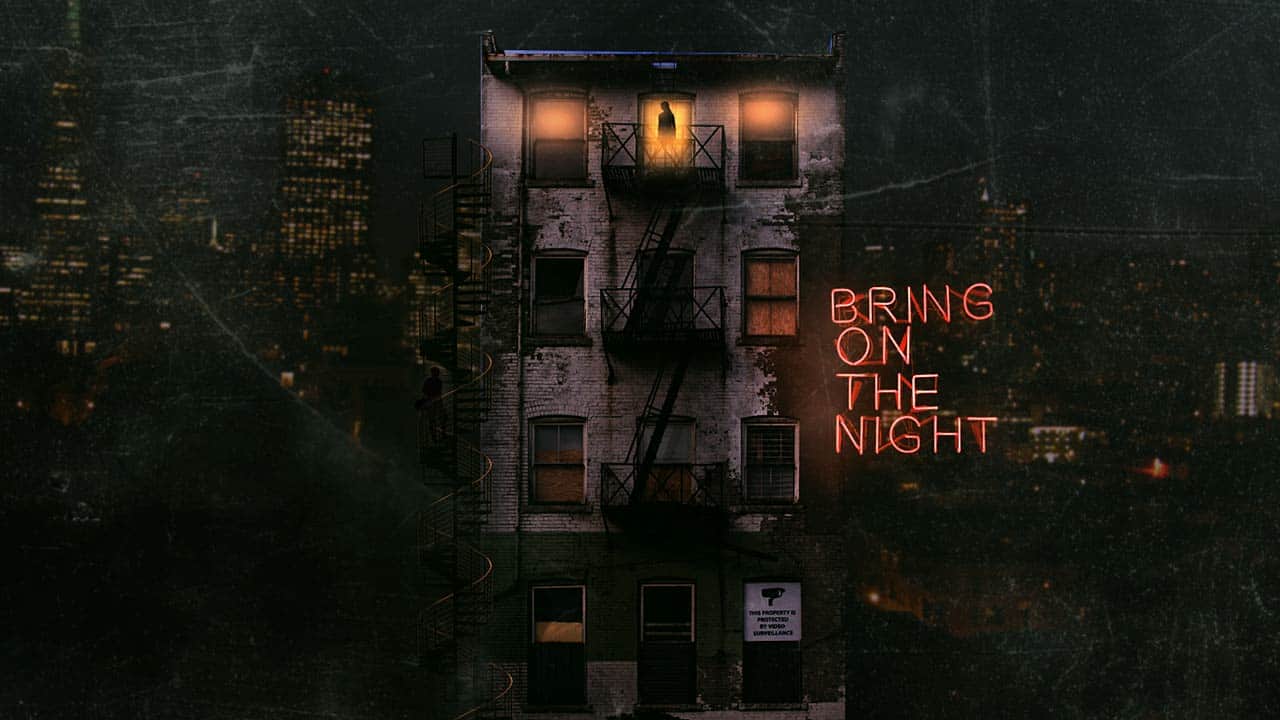
Wiztoonz Academy of Media & Design’s Film making and Photography Head, Mahesh Ravi shares his workflow for creating the conceptual image, Bring on the Night using Adobe Photoshop.
I usually get inspired imagery from dreams. When an image from a dream stays in my head for longer periods, I do tend to push it out for creative closure. Sometimes via photography, short films, stories or a digital image manipulation (like this one). I saw life instances of a couple staying on the top floor a very shady yet urban apartment building somewhere in Bangalore. There was something unsettling about the whole dream and wanted to bring that mood to the composition.
This time I worked with stock images. I use alamy, if its a business project and unsplash for personal projects. I do have an envato membership that I use once in a while for royalty free images.

I started with cleaning up the elements. Removing backgrounds, cleaning textures, de-noising, basic color management etc.
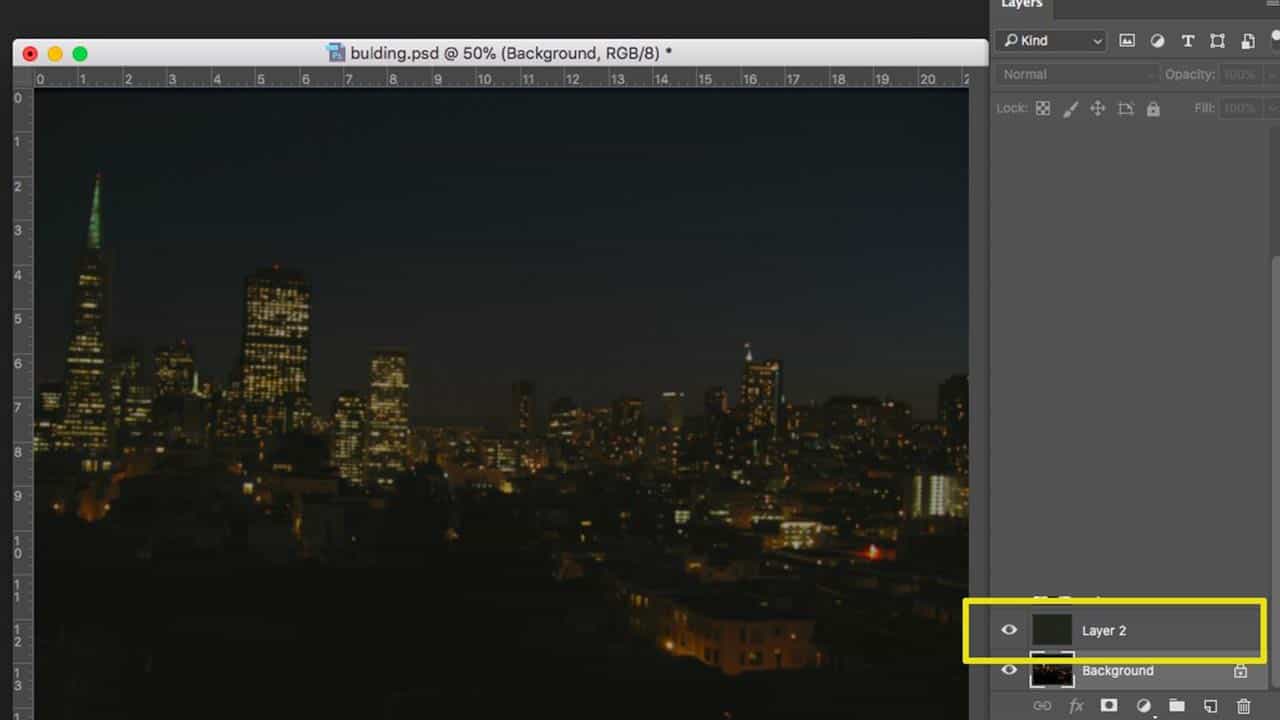
Started with adding a blur to the background image as I wanted the focus to be sharp on the main building element. Also being a wide shot, I shouldn’t go crazy with the blur thus making it look fake. 0.2 radius on Gaussian Blur worked for me.
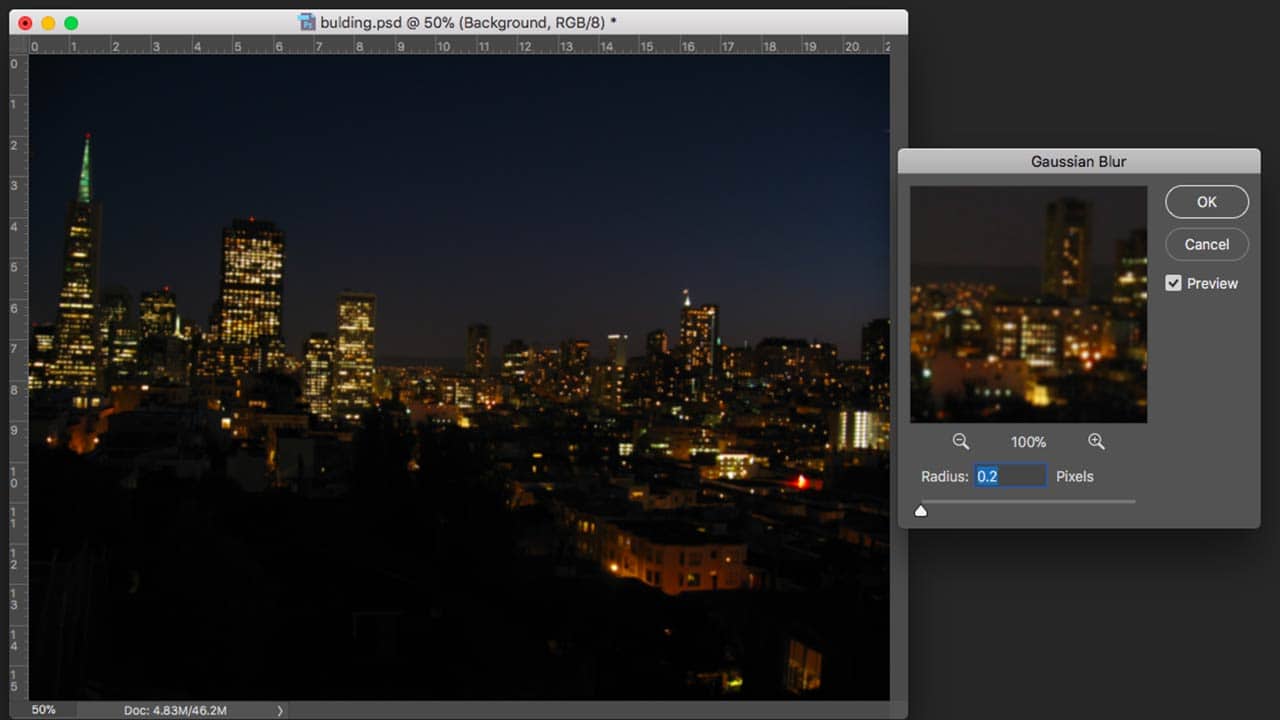
Also wanted to reduce the light. Faked a fog/dust overlay by creating a solid grey layer on top of the image and reducing it’s opacity.
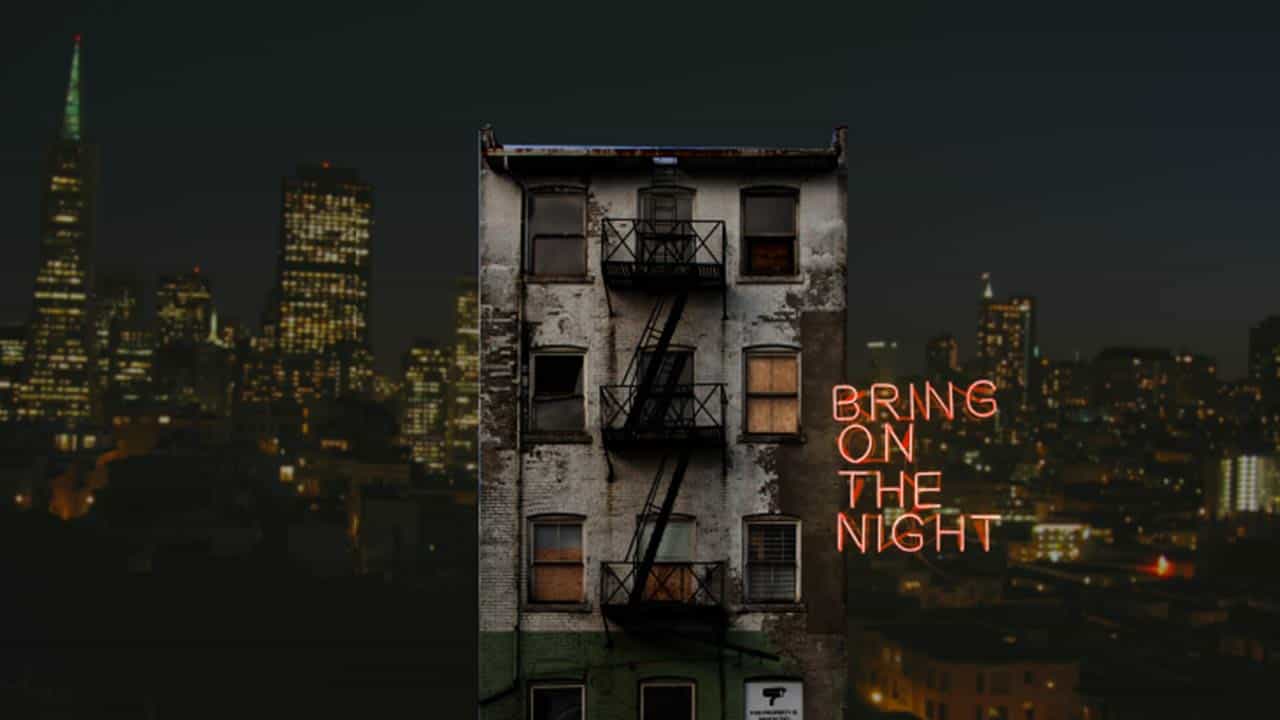
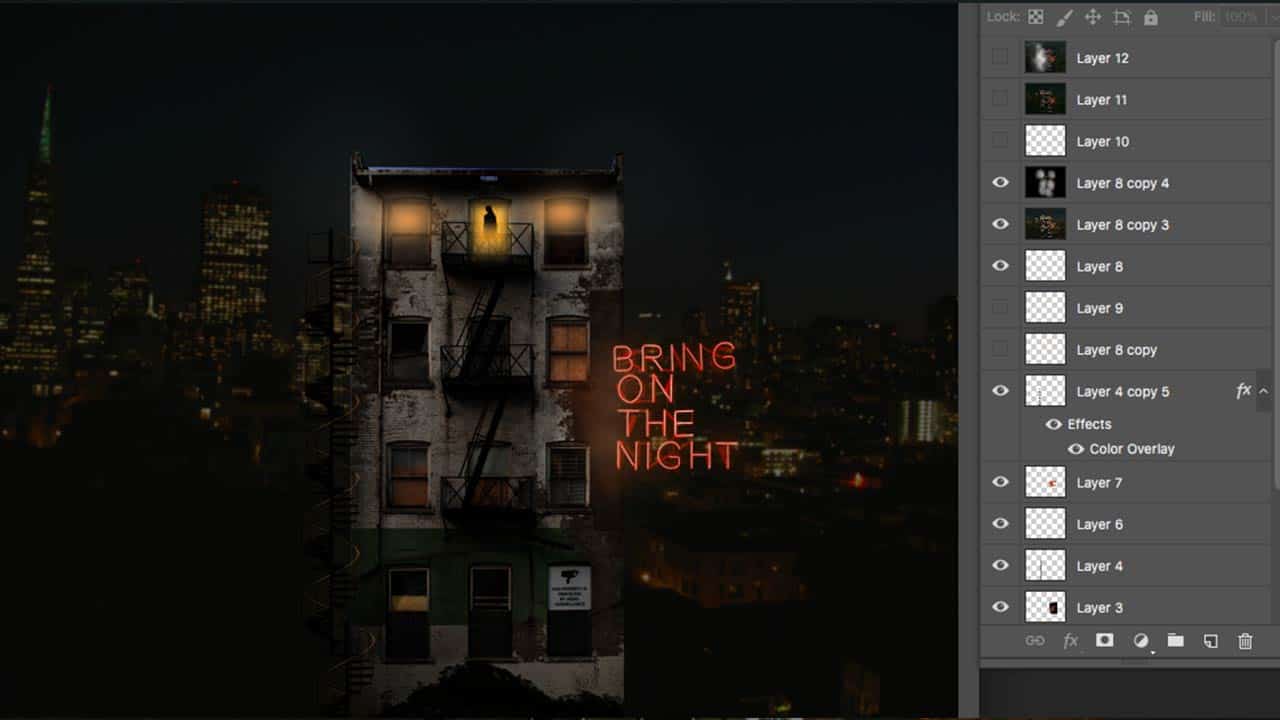
Brought in the main building image. As it was pretty much a basic geometry, I used the polygonal lasso tool to select and remove the background. Replaced some windows and added a dirty concrete texture on the walls (using layer blending mode- multiply). Added a Brightness Contrast Adjustment to match with the contrast of the background image.

The next element I brought it was the neon sign. Changed the Hue of the light to red.
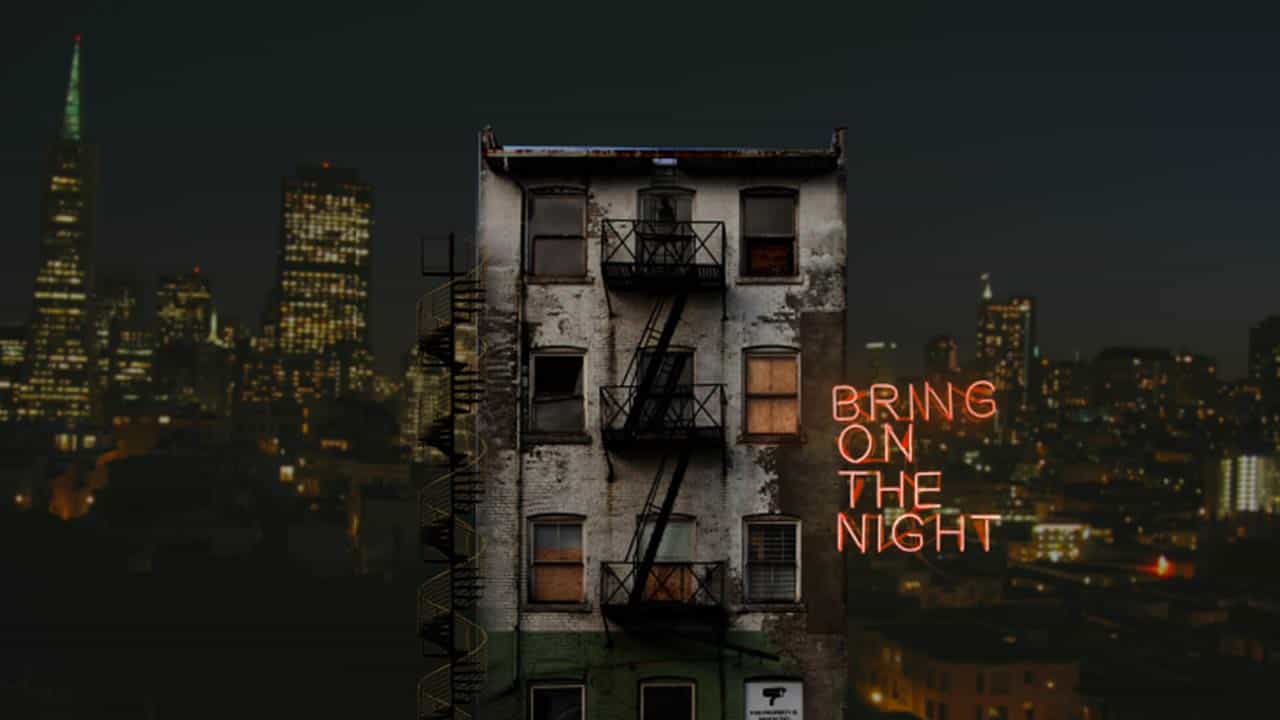
Similarly brought the Spiral Stairs and added it’s shadow on the wall using the brush.

The female character was added. I traced a silhouette out from an image and placed it on our composition.
Added a very loud, surreal light coming from behind her, again using the brush tool.
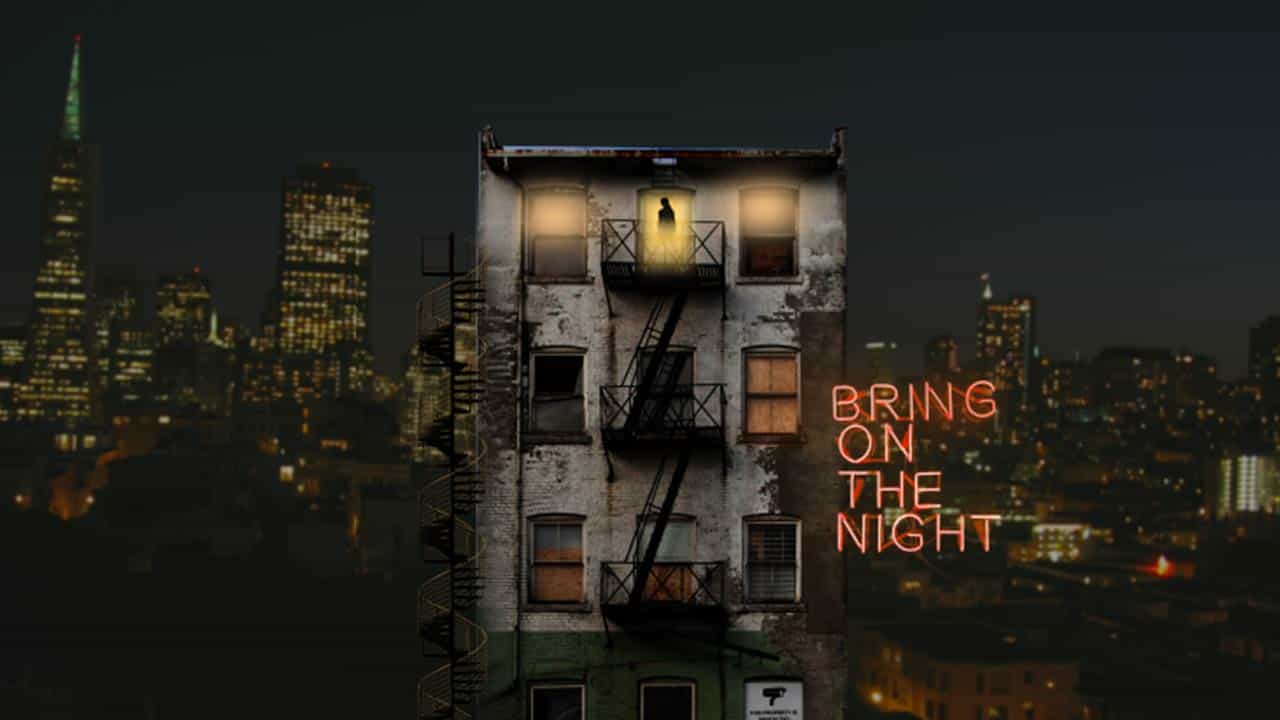
Changed the hue of the lights to match with the overall image. Also did play with the overall composition’s contrast to make the elements work better with each-other.
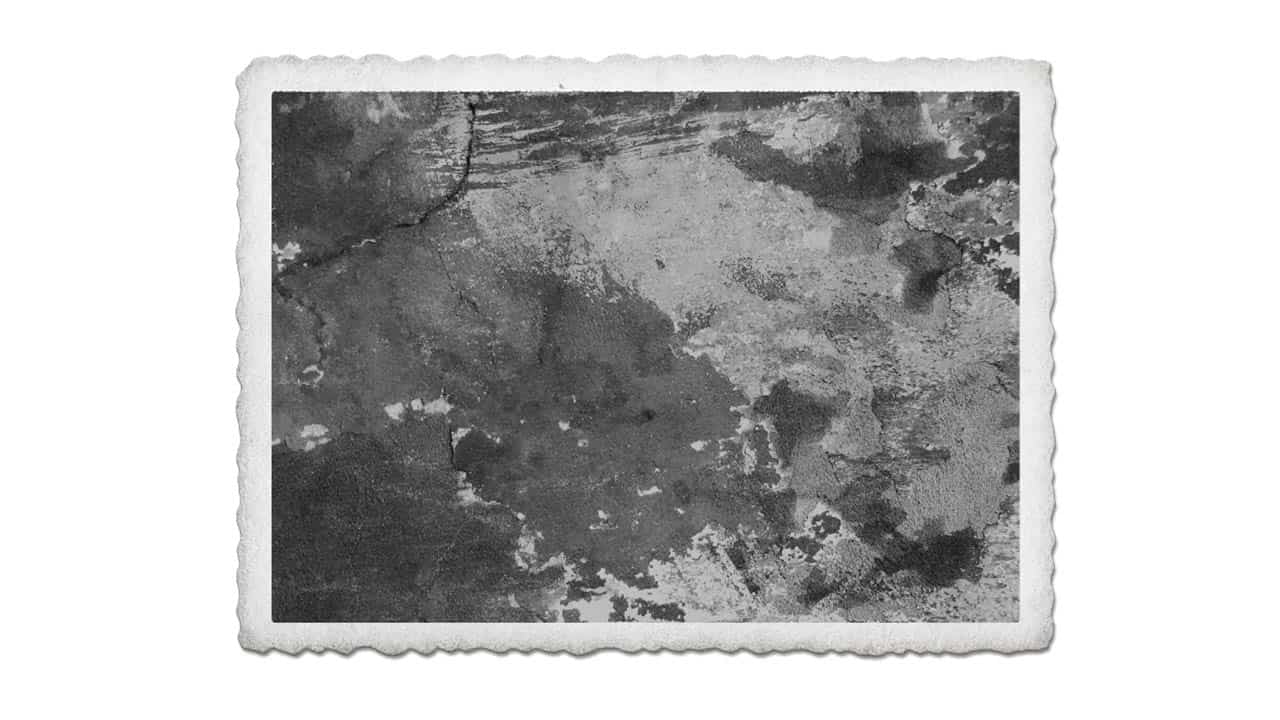
Finally to bring a retro-photographic quality, I used scans of an old scratchy negative to overlay over the composite.